How to Install a Theme
With Vega, we’ve made the process of customizing your iPhone as simple as possible. Follow these steps carefully and you won’t encounter any problem.
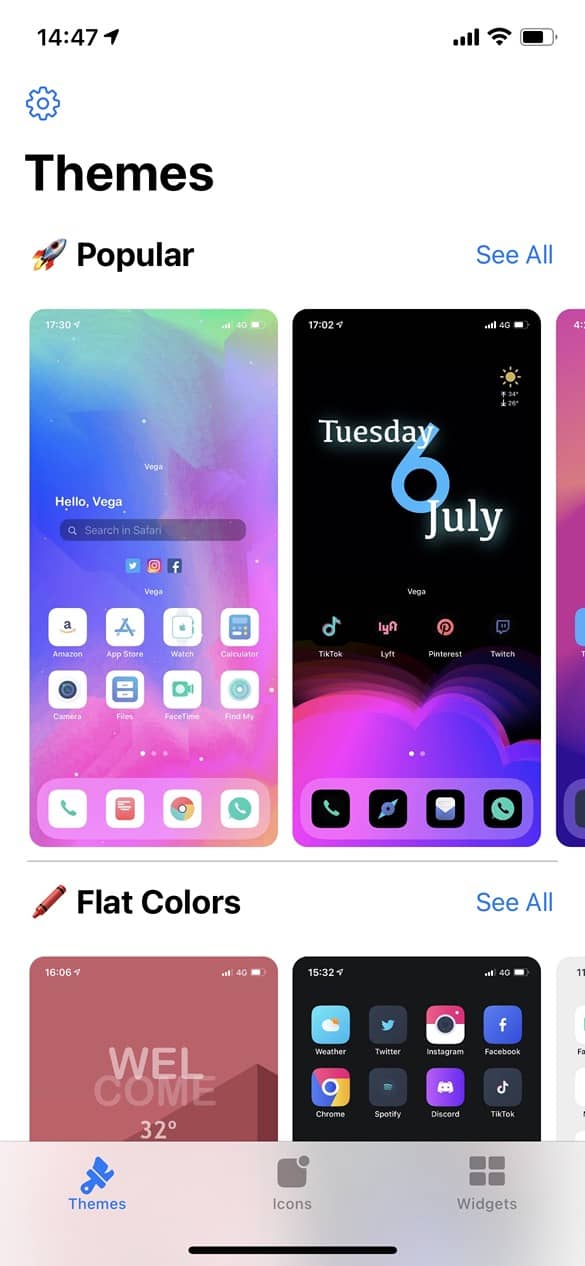
Step 1: Choosing a theme
In the Themes Section, you’ll see a list of categories full of ready-to-use themes. Choose the one you like to begin with and tap on it.
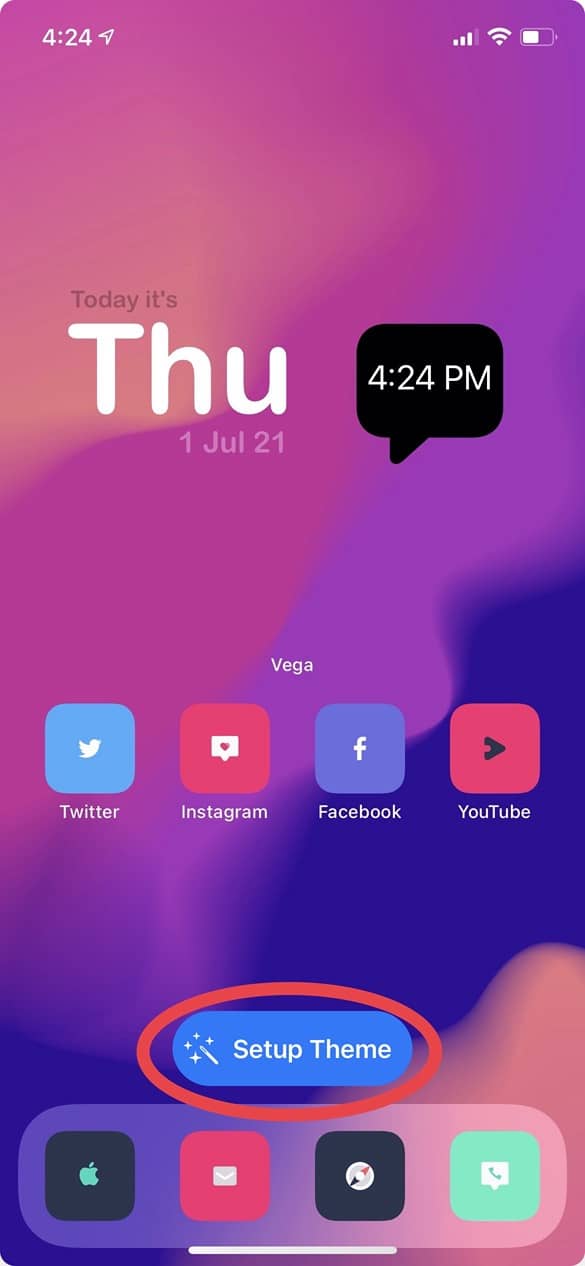
Step 2: Opening the Wizard
Once you’ve chosen the theme you want to install and you see it full screen, you’ll see a button called “Setup Theme” that will open the wizard that will set up everything. Tap on that button.
Step 3: saving Wallpaper and Widgets
Once you’ve tapped on the Setup Theme button, you’ll see a new screen with several options. This screen is divided in two main sections: wallpapers / widgets and icons. Let’s begin with the first one: wallpapers and widgets.
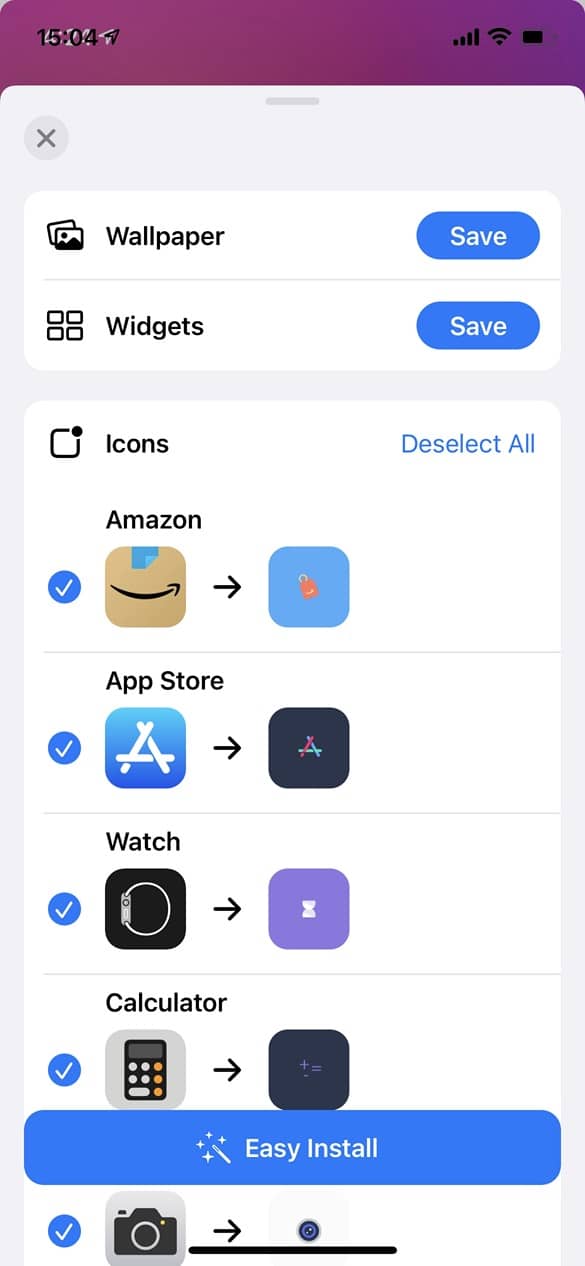
The only thing you need to do is to tap on both buttons to save the wallpaper and the widgets used in this theme. Heads up: not every theme includes widgets so you might not see the corresponding button.
If your iPhone asks for permission to access the Gallery, make sure you grant it. Otherwise, Vega won’t be able to save the wallpaper.
The next step is to select the icons you want to see changed on your home screen. Bear in mind that Vega won’t replace any icon, it’ll create new ones so that you will always have the option to revert back to your initial state. Once you’re happy with your selection, tap on the Easy Install button and another window will show up.
Step 4: unlocking icons (for free users)
If you’re not a premium user, you have the option to unlock the icons you selected in the previous step by watching an advertisement. The only thing you need to do is to tap on the “Unlock” button you’ll see located at the right of every icon.
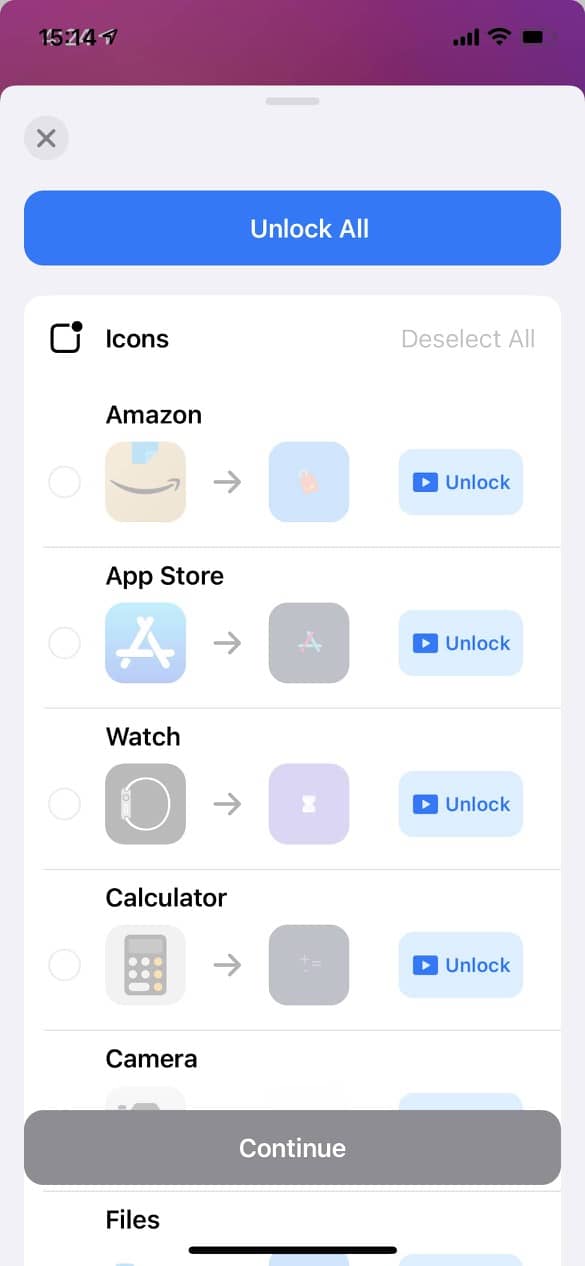
Once you’ve unlocked the icons you want to see changed, click on the “Continue” button located at the bottom of this window.
Premium users can skip this step as all icons are already unlocked.
Step 5: downloading the profile
Vega will create a Profile for you so you don’t have to manually create every icon on your homes screen. It’s a safe process that you can always revert with one click.
The only thin you need to do is to Download the Profile by tapping on the Download button located and the bottom of this window.
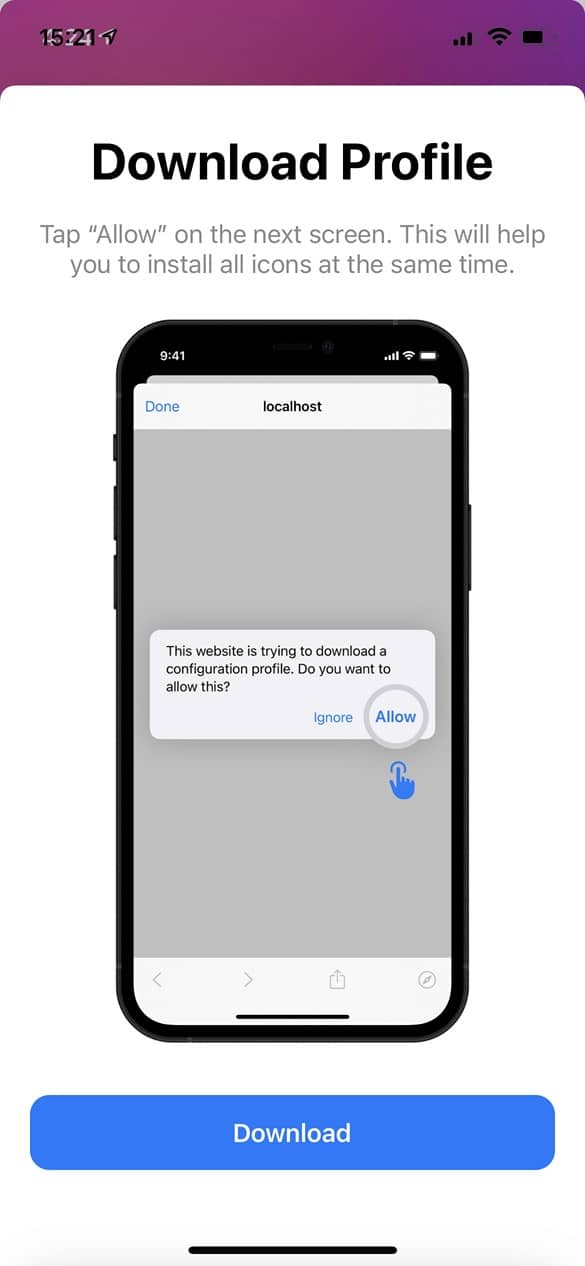
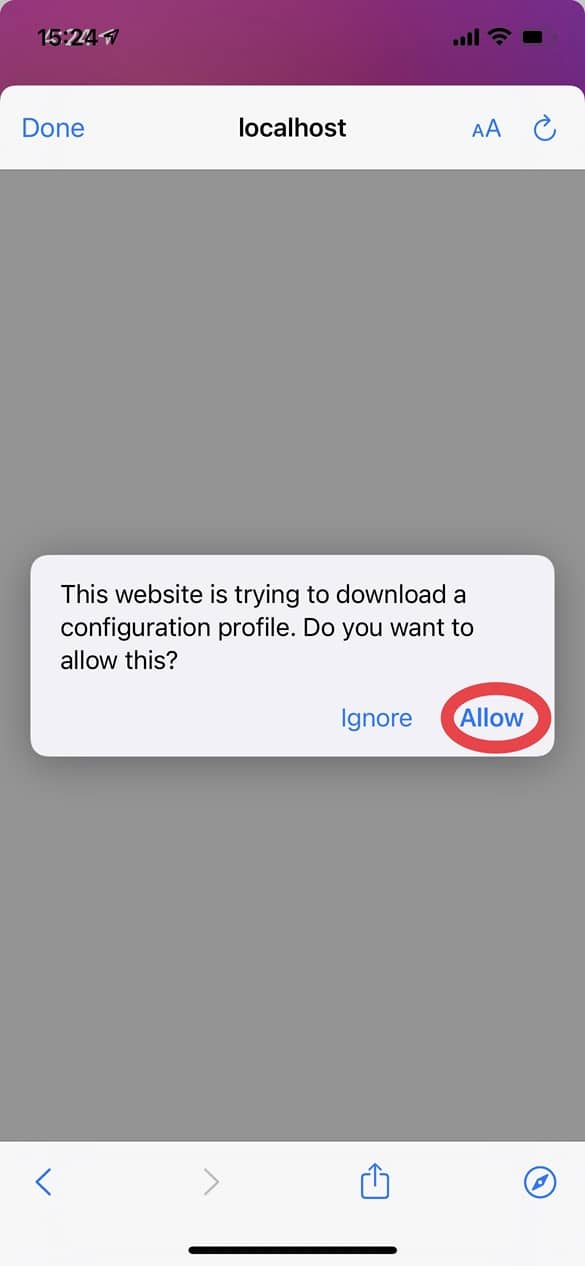
Once you’ve tapped on Download, you’ll see another window asking for permission to download a Configuration Profile. Tap on Allow.
This process will download a file that you’ll have to install to see your icons on your home screen. Click on the Continue button and this window will close.
Step 6: installing the Icons
Now that you’ve downloaded the configuration profile, you need to install it. It includes all the icons you selected in the previous step. Tap on Open Settings.
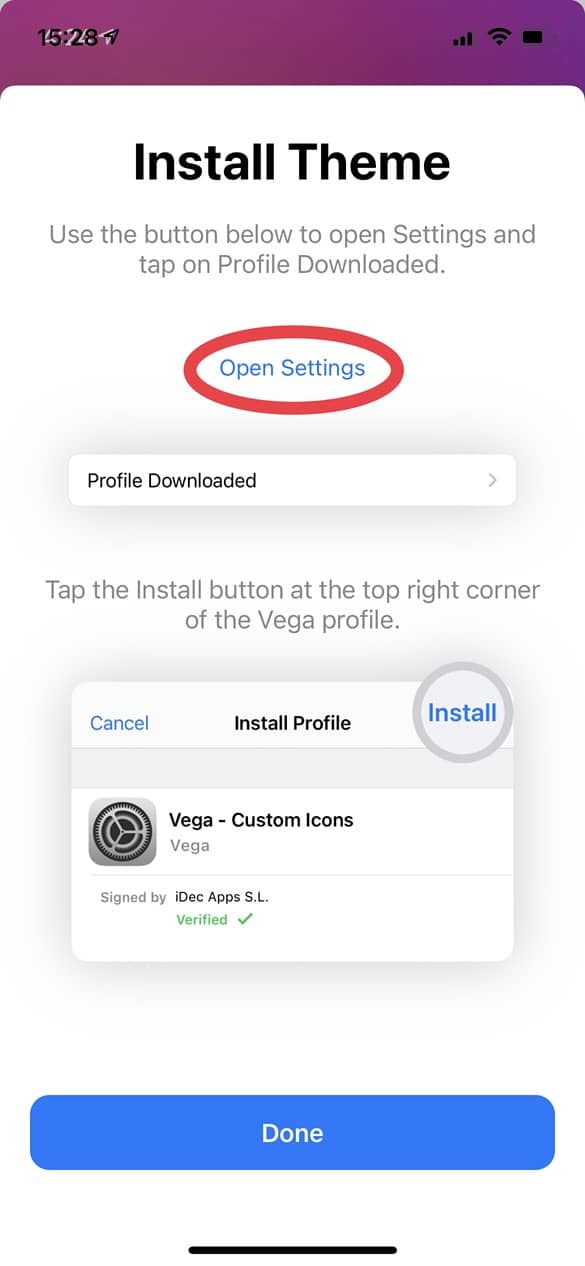
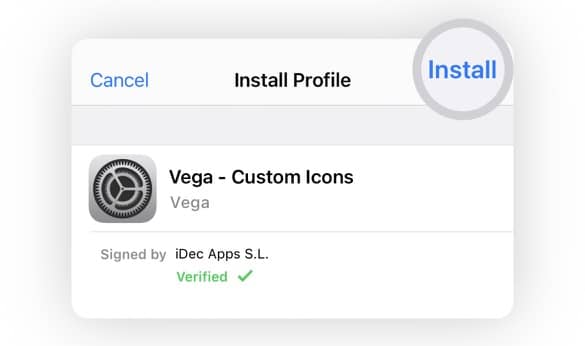
Once you’re in the Settings app, you’ll see a Section called “Profile Downloaded”. This is the file we downloaded in the previous step. Tap on it.

The next step is to actually install it. Tap on the Install button located at the upper right corner. You’ll be asked to insert your iPhone unlock code.
And that’s it! If you now go to your home screen, you’ll see your new fully funcional icons added.
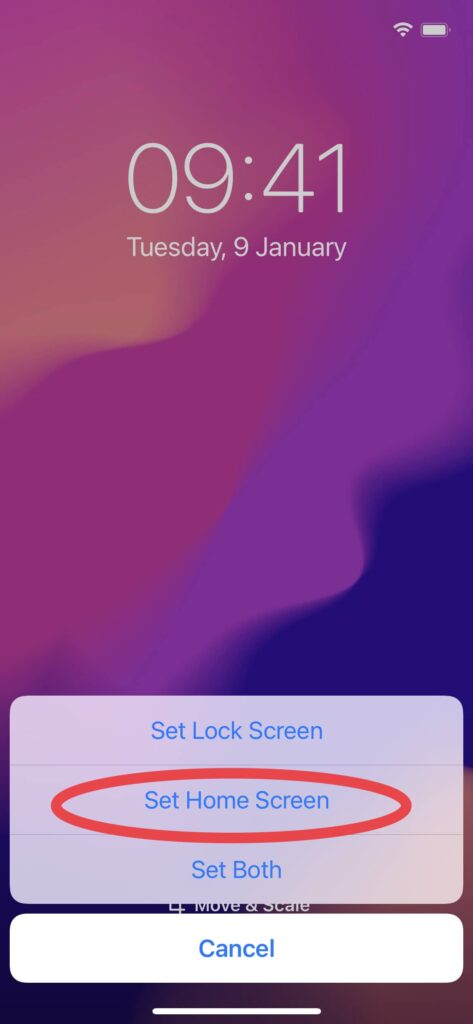
Step 7: Changing the Wallpaper
Now that you have already installed the new icons, let’s complete the installation with the Wallpaper. This is a very straight forward process as we’ve already saved the wallpaper in the Step 3.
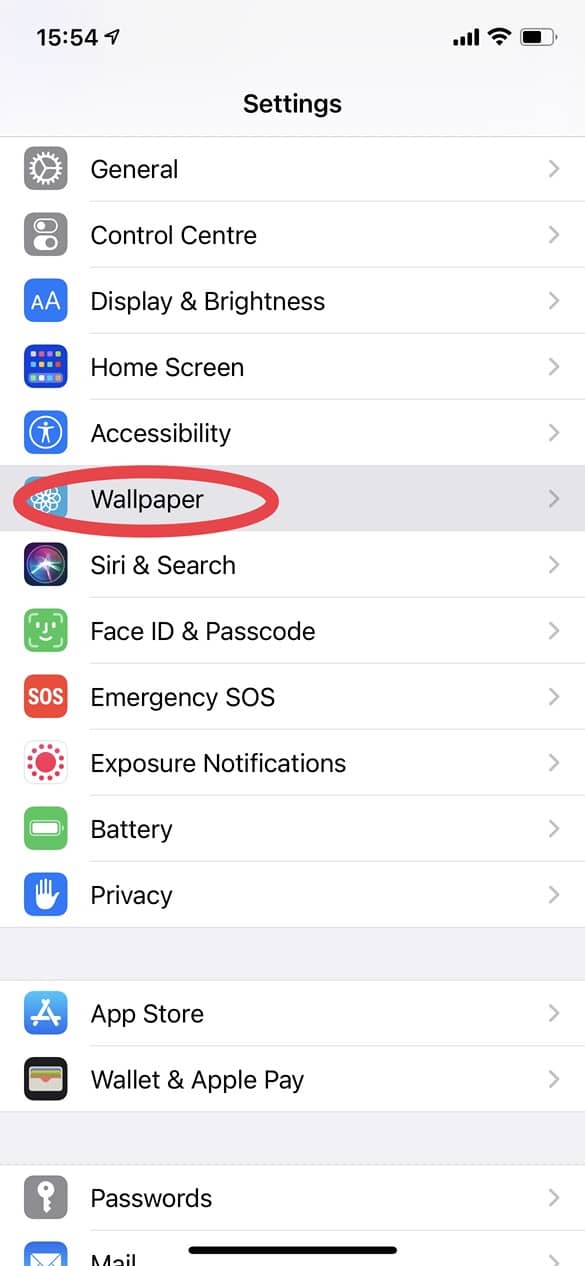
Go to Settings and then tap on Wallpaper
Tap on Choose a New Wallpaper and then select the All Photos album, where the wallpaper should be placed. It should be the last photo in your gallery. Tap on it and you’re just a button away! Finally tap on Set Home Screen and that’s it!